从0开始开发iOS应用
最近在学习移动端Native开发的一些东西,本文将整理从零开始使用Objective-C开发iOS应用的一些事项。
<!--more-->
本文是在学习iOS开发时整理的相关笔记,同时写了一个不太完善的Demo项目,整个项目包括
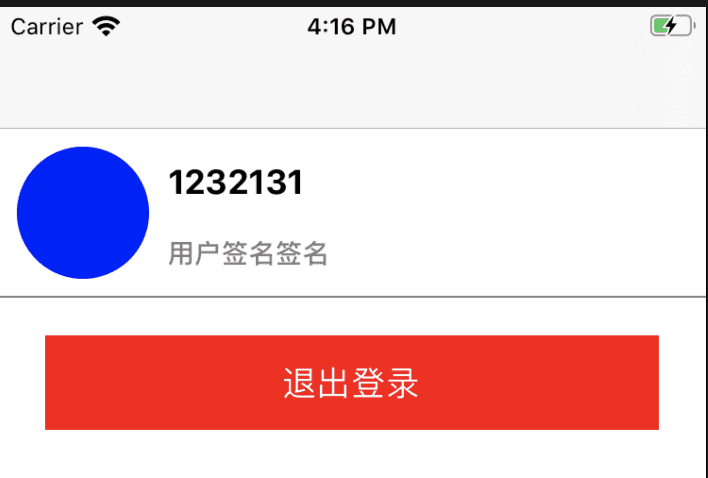
- 登录页,实现文本输入、本地存储、页面跳转
- 内容列表页,包含网络请求,文本图片内容布局、列表滚动
- 内容详情页,
相关代码均放在github上面。
参考
1. iOS设计
1.1. MVC
iOS是经典的MVC架构,
UIView是视图组成的基本单位,- Model提供整个业务的数据,数据来自于内存、网络或者本地文件
ViewCotroller使用Model提供的接口获得数据,然后更新UIView的展示,包含了一些常规的生命周期钩子
@interface HelloController ()
@property(nonatomic, strong, readwrite) UILabel *lable;
@end
@implementation HelloController
- (instancetype)init {
self = [super init];
// 一些初始化操作
return self;
}
- (void)viewDidLoad {
[super viewDidLoad];
// 初始化label
_lable = [[UsILabel alloc] init];
_lablelable.text = @"hello world";
[_lable sizeToFit];
_lable.center = CGPointMake(self.view.frame.size.width/2, self.view.frame.size.height/2);
// 每个ViewController都有一个根View,可以像这个view中添加其他的UIView
[self.view addSubview:_lable];
[self fetchTestData];
}
// 调用Model获取数据
- (void)fetchTestData {
// 封装的HTTP请求
[TestModel fetchTestData:^(NSString *name) {
// 更新视图的数据
dispatch_async(dispatch_get_main_queue(), ^{
_lable.text= name
});
}];
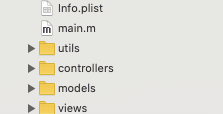
}因此,一个经典的iOS目录大概是这个样子的
在学习的时候找到了一个Shop-iOS,感觉代码写的比较规范,照着源码学到了不少东西。
1.2. delegate模式
由于需要大量使用库里面提供的组件,为了满足各式各样的自定义逻辑,UIKit中大量使用了delegate的模式
delegate类似于组件暴露出去的一个方法,当组件内部执行到某些操作时,会读取delegate并执行相关的方法。
下面是通过代理实现自定义UITabBarController各个item点击事件
UITabBarController *rootController = [[UITabBarController alloc] init];
rootController.delegate = self; // 当前对象按需实现对应的代理方法

// 当前对象按需实现对应的代理方法
@interface SceneDelegate ()<UITabBarControllerDelegate>
@end

@implementation SceneDelegate

- (void)tabBarController:(UITabBarController *)tabBarController didSelectViewController:(UIViewController *)viewController{
    NSLog(@"did select");
}
@end
1.3. 项目与Pod
打开一个iOS项目,往往可以看见两个文件.xcodeproj和.xcworkspace

workspace和project,一个workspace 可以包含多个project,每个第三方库都可以作为一个单独的project,因此双击workspace文件就可以直接打开项目
iOS基于Pod管理第三方依赖, cocoapods的流程
- 首先编写一个podfile,声明相关依赖
- 执行
pod install,从仓库拉取依赖代码,生成一个podsProject - 将
podsProject与我们自己的代码myProject合并,生成一个workspace
target 'iOSDemo' do
    pod 'AFNetworking'
end
2. UIKit
2.1. UIWindow
UIWindow是整个应用根节点,在iOS13之前通过Appdelegate初始化UIWindow
- iOS13之前,Appdelegate的职责全权处理App生命周期和UI生命周期;
- iOS13之后,Appdelegate的职责是:
- 处理 App 生命周期
- 新的 Scene Session 生命周期,现在UI生命周期交给新增的
SceneDelegate处理,包括初始化rootViewController等
在SceneDelegate.m中的willConnectToSession方法中初始化整个应用的window对象
UIWindowScene *windowScene = (UIWindowScene *)scene;
self.window = [[UIWindow alloc] initWithWindowScene:windowScene];
// 初始化rootController,
self.window.rootViewController = rootController;
[self.window makeKeyAndVisible];
在初始化了全局window对象之后,还需要初始化一个rootViewController,在常规的APP中农,一般使用UITabBarControsller或UINavigationController,用于管理页面级别的UIView。
2.2. UIView
UIView是视图的基础,参考:UIView
UIView可以理解为div等盒子,可以设置尺寸、布局、颜色等展示信息,也可以添加点击等交互事件
s
// view栈,后加入的view会遮挡先加入的view,类似于zIndex
UIView *view1 = [[UIView alloc] init];
view1.backgroundColor = [UIColor greenColor];
view1.frame = CGRectMake(100, 100, 100, 100);
[self.view addSubview:view1];

UIView *view2 = [[UIView alloc] init];
view2.backgroundColor = [UIColor redColor];
view2.frame = CGRectMake(150, 150, 100, 100);
[self.view addSubview:view2];此外还可以通过继承UIView实现自定义View,相关的生命周期包括
@interface TestView : UIView

@end

@implementation TestView

- (instancetype)init{
    self = [super init];s
    if(self){
        // 执行一些操作,如初始化子View
    }
    return self;
}s

- (void)willMoveToSuperview:(nullable UIView *)newSuperview{
    [super willMoveTosSuperview:newSuperview];
}
- (void)didMoveToSuperview{
    [super didMoveToSuperview];
}
- (void)willMoveToWindow:(nullable UIWindow *)newWindow{
    [super willMoveToWindow:newWindow];s
}
- (void)didMoveToWindow{
    [super didMoveToWindow];
}
ViewCotroller主要用于展示管理UIView,对应的生命周期处理不同的业务逻辑,各生命周期执行顺序
// 构造
viewDidLoad -> viewWillAppear -> viewDidAppear
// 销毁
viewWillDisappear -> viewDidDisappear
2.3. 常见的UIView
2.3.1. UITableView
- 通过
UITableViewDataSource实现定义、复用cell,个数等逻辑 - 通过`UITableViewDelegate实现点击cell、单个cell高度等逻辑
2.3.2. UICollectionView
UITableView只能实现单列,对于一个可以双列或多列的滚动则可以使用UICollectionView
@interface GTVideoViewController ()<UICollectionViewDataSource, UICollectionViewDelegate>

@end

@implementation GTVideoViewController
- (NSInteger)collectionView:(UICollectionView *)collectionView numberOfItemsInSection:(NSInteger)section {
    return 20;
}

// The cell that is returned must be retrieved from a call to -dequeueReusableCellWithReuseIdentifier:forIndexPath:
- (__kindof UICollectionViewCell *)collectionView:(UICollectionView *)collectionView cellForItemAtIndexPath:(NSIndexPath *)indexPath{
    UICollectionViewCell * cell = [collectionView dequeueReusableCellWithReuseIdentifier:@"UICollectionViewCell" forIndexPath:indexPath];

    cell.backgroundColor = [UIColor redColor];
    return cell;
}


- (void)viewDidLoad {
    [super viewDidLoad];
    // self.view.backgroundColor = [UIColor whiteColor];

    UICollectionViewFlowLayout *flowlayout = [[UICollectionViewFlowLayout alloc] init];
    UICollectionView *view = [[UICollectionView alloc] initWithFrame:self.view.bounds collectionViewLayout:flowlayout];

    view.dataSource = self;
    view.delegate = self;

    [view registerClass:[UICollectionViewCell class] forCellWithReuseIdentifier:@"UICollectionViewCell"];

    [self.view addSubview:view];
}
UICollectionViewFlowLayout是一个抽象类,用于控制每个UICollectionViewCell的尺寸和整体布局,此外还可以实现sizeForItemAtIndexPath方法来控制某个indexPath的cell具体的尺寸
2.3.3. UIScrollView
类似于overflow:auto,需要设置contentSize控制宽高。
self.view.backgroundColor = [UIColor redColor];
UIScrollView *view = [[UIScrollView alloc] initWithFrame:self.view.bounds];


NSArray *colorArr = @[[UIColor redColor], [UIColor blueColor], [UIColor yellowColor]];

for(int i = 0; i < 3; ++i){
    [view addSubview:({
        UIView *page = [[UIView alloc] initWithFrame:CGRectMake(view.bounds.size.width*i, 0, view.bounds.size.width, view.bounds.size.height)];
        page.backgroundColor = [colorArr objectAtIndex:i];
        page;
    })];
}

view.pagingEnabled = YES;
view.backgroundColor = [UIColor blueColor];
view.contentSize = CGSizeMake(self.view.bounds.size.width*3, self.view.bounds.size.height);

[self.view addSubview:view];
2.3.4. UILabel
展示文字,需要注意sizeToFit动态控制字体
2.3.5. UIImage
展示图片,注意iOS工程中图片的使用,最简单的方式就是直接将图片拉到项目中
参考:ios 图片资源管理的四种方式(Assets,bundle文件,Resource,沙盒文件目录下)
UIImageView *img = [[UIImageView alloc] initWithFrame:CGRectMake(295, 20, 60, 60)];
img.image =[UIImage imageNamed:@"test.png"];
2.3.6. WKWebView
虽然WKWebView并不是UIKit提供的,但还是将他放在这一章节了。参考:UIWebView和WKWebView的一些比较
#import <WebKit/WebKit.h>

-(void) viewDidLoad{
    [super viewDidLoad];

    NSLog(@"123");
    self.webview = [[WKWebView alloc] initWithFrame:CGRectMake(0, 80, self.view.frame.size.width,self.view.frame.size.height-80)];

    [self.view addSubview:self.webview];
    [self.webview loadRequest:[NSURLRequest requestWithURL:[NSURL URLWithString:@"https://www.shymean.com"]]];
}
2.4. 常见的样式效果
2.4.1. 设置尺寸
// 初始化
view.frame = CGRectMake(100, 100, 100, 60)

// 更新
CGRect newFrame = skillContent.frame;
newFrame.size = CGSizeMake(100, 200);
[view setFrame:newFrame];
2.4.2. 背景色
view.backgroundColor = [UIColor yellowColor];2.4.3. 圆角
view.layer.masksToBounds = YES;
view.layer.cornerRadius = 35;
2.4.4. 字体
label.text = @"用户昵称xxxx";
label.font = [UIFont systemFontOfSize:18 weight:UIFontWeightBold];
headSign.textColor = [UIColor grayColor]; // 字体颜色
2.4.5. 边框
设置全边框**
view.layer.borderWidth = 1;
view.layer.borderColor = [[UIColor grayColor] CGColor];UIKit并没有提供单边框的功能,因此需要自己实现,原理就是通过subLayer在view对应方位画一条线,
UIView *test = [[UIView alloc] initWithFrame:CGRectMake(0, 200, 375, 50)];
CALayer *layer = [CALayer layer];
layer.frame = CGRectMake(0, test.frame.size.height - 1, test.frame.size.width, 1);
layer.backgroundColor = [[UIColor grayColor] CGColor];
[test.layer addSublayer:layer]; // 将绘制border的layer添加到当前图层
2.4.6. 阴影
参考:在 iOS 里 100% 还原 Sketch 实现的阴影效果
跟上面的单边框类似,需要自己修改layer实现。
2.4.7. 相对位置
在initWithFrame之后,可以修改frame重新指定view的位置

在上面的布局中,由于标题的高度是根据内容撑开的,为了让下面的内容距离标题指定边距,则可以根据标题的内容高度计算内容的origin
UILabel *title = [[UILabel alloc] initWithFrame:CGRectMake(120, 25, 250, 20)];
title.text = @"标题标题标题标题四标题标题标题标题四标题标题标题标题四标题标题标题标题四";
title.font = [UIFont systemFontOfSize:20];
//    title.lineBreakMode = NSLineBreakByWordWrapping;
title.numberOfLines = 0;
title.backgroundColor = [UIColor redColor];
[title sizeToFit];

UILabel *content = [[UILabel alloc] initWithFrame:CGRectMake(120, 50, 250, 20)];
content.text = @"内容内容内容内容内容内容内容内容内容内容内容内容";
title.font = [UIFont systemFontOfSize:14];
content.lineBreakMode = NSLineBreakByWordWrapping;
content.numberOfLines = 0;
[content sizeToFit];
content.frame = CGRectMake(120, title.frame.origin.y +  title.frame.size.height + 5, 250,  content.frame.size.height);
2.4.8. UIScrollView滚动内容自适应
以计算内容高度为例子
CGFloat scrollViewHeight = 42.0f;
for (UIView *view in page.subviews) {
    // 如果使用yoga,则取yoga布局的高度
    scrollViewHeight += view.yoga.height.value;
    // 常规布局去frame的高度
    // scrollViewHeight += view.frame.size.height;
}
NSLog(@"%f", scrollViewHeight);
scrollView.contentSize = CGSizeMake(self.bounds.size.width, scrollViewHeight);
3. 布局方案
3.1. frame
frame布局类似于Web中的绝对定位,通过指定UIView的宽高及横纵坐标来控制对应视图
3.2. autoLayout
描述性语言,声明距离父view的约束条件,系统自定计算各个位置,类似于Web中的margin、padding的
这个东西写起来太麻烦了,个人感觉初学者暂时没必要学习
3.3. flex
参考
体验了iOS内置的布局方式
- frame布局,比较简单,类似于所有view都使用绝对定位+定位尺寸实现,缺点在于需要自己计算,在一些需要自动填充尺寸的场景中很麻烦
- autoLayout布局,看了一下语法就溜了,太繁琐了
使用YoGaKit可以实现类似于Web的Flex布局,Yoga实现的是W3C关于FlexBox的一个子集
首先安装依赖
use_frameworks!
target 'iOSSample' do
    pod 'Yoga' # Yoga实现
    pod 'YogaKit' # Yoga提供的Objective-C和swift库
end然后引入#import <YogaKit/UIView+Yoga.h>,实现了UIView对象的configureLayoutWithBlock方法,flex布局属性均在该Block中配置
UIView *head = [[UIView alloc] init];
// 可以看见一些比较熟悉的web样式声明语法
[head configureLayoutWithBlock:^(YGLayout *layout) {
    layout.isEnabled = YES; // 需要开启flex布局
    layout.width = YGPointValue(375);
    layout.height = YGPointValue(90);
    layout.marginLeft = YGPointValue(0);
    layout.paddingHorizontal = YGPointValue(10);

    layout.alignItems = YGAlignCenter;
    layout.flexDirection = YGFlexDirectionRow;
}];
具体使用还在进一步探索中...
在写的时候突然飞侠为啥实现下面这个布局要写写上将近80行代码,难道是打开方式不对?
后来发现,上面的media部分,完全没必要使用flex来实现,基本的frame实际上就可以很简单的完成布局工作。
随着实现更多的UI,关于flex布局我感觉,小的布局可以使用Frame,对于整体的布局可以使用Flex,根据BEM命名规则来划分的话,Box使用Flex布局,而Element使用Frame布局,这样可以减少布局代码量,实现整体布局也比较方便
4. 事件交互
UIControl及Target-Action监听事件,给UIView添加事件及注册处理函数
[btn addTarget:self action:@selector(btnClick) forControlEvents:UIControlEventTouchUpInside];
- (void)btnClick{
    NSLog(@"123");
}
使用UIGestureRecognizer实现自定义点击与手势,构造一个事件识别函数,然后绑定到某个UIView上
UITapGestureRecognizer *tap = [[UITapGestureRecognizer alloc] initWithTarget:self action:@selector(jumpTo)];
[view1 addGestureRecognizer:tap];
// 可以通过deletegate 处理事件触发流程的细节,比如控制点击某些地方响应事件,某些地方不响应事件
5. 网络请求
使用了比较流行的AFNetworking来管理网络请求
pod 'AFNetworking', '~> 4.0' # 网络请求库iOS中的Block类似于JS中的回调函数,可以在合适的时机如网络请求成功或失败时执行,因此可以将AFNetworking进一步封装成HttpClient工具类
5.1. 封装AFNetworking工具类
#import "HttpClient.h"
#import "UserModel.h"

#define kTimeOutInterval 30 // 请求超时的时间

@interface HttpClient ()
@property AFHTTPSessionManager *manager;

@end

@implementation HttpClient
- (instancetype)init {
    self = [super init];

    _manager = [AFHTTPSessionManager manager];
    // 超时时间
    _manager.requestSerializer.timeoutInterval = kTimeOutInterval;

    // 声明上传的是json格式的参数
    _manager.requestSerializer = [AFJSONRequestSerializer serializer]; // 上传JSON格式

    // 声明获取到的数据格式
    _manager.responseSerializer = [AFJSONResponseSerializer serializer]; // 解析响应

    return self;
}

+ (instancetype)instance {

    // 实现单例
    static HttpClient *client;
    static dispatch_once_t once;
    dispatch_once(&once, ^{
        client = [[HttpClient alloc] init];
    });
    return client;
}


// get 请求
+ (void)get:(NSString *)url params:(NSDictionary *)params success:(void (^)(NSDictionary *))successHandler failure:(void (^)(NSError *))failure {
    [[self instance] request:url method:@"GET" params:params
                     success:^(NSDictionary *data) {
                         successHandler(data);
                     }
                     failure:failure];
}

+ (void)get:(NSString *)url params:(NSDictionary *)params success:(void (^)(NSDictionary *))successHandler {
    [self get:url params:params success:successHandler failure:nil];
}

- (void)request:(NSString *)url method:(NSString *)method params:(NSDictionary *)params success:(void (^)(NSDictionary *))success failure:(void (^)(NSError *))failure {

    NSString *token = [UserModel getAccessToken];
    if (token == nil) {
        token = @"";
    }

    // 创建请求类
    NSDictionary *header = @{@"Authorization": token};
    NSURLSessionDataTask *task = [_manager dataTaskWithHTTPMethod:method URLString:url parameters:params headers:header uploadProgress:nil downloadProgress:nil success:^(NSURLSessionDataTask *task, id _Nullable responseObject) {
        NSDictionary *dict = (NSDictionary *) responseObject;
        NSNumber *code = dict[@"code"];
        NSString *message = dict[@"msg"];
        NSDictionary *data = dict[@"data"];
        success(data);
    }                                                     failure:^(NSURLSessionTask *task, NSError *error) {
        NSLog(@"%@", error);
        failure(error);
    }];
    [task resume];
}

@end
然后就可以基于这个工具封装相关的模型方法
+ (void)loginWithAccount:(NSString *)username password:(NSString *)password success:(void (^)(NSDictionary *))success {
    [HttpClient get:@"http://127.0.0.1:7654/api/auth/login" params:@{@"username": username, @"password": password} success:^(NSDictionary *data) {
        success(data);
    }];
}
在ViewController中,就可以调用模型方法处理数据逻辑了
// 注册点击事件
UITapGestureRecognizer *tap = [[UITapGestureRecognizer alloc] initWithTarget:self action:@selector(login)];

// 实现点击提交登录
- (void)login {
    __weak typeof(self) weakSelf = self;
    [UserModel loginWithAccount:_username.text password:_password.text success:^(NSDictionary *data) {
        // 登录成功,返回个人中心
        [weakSelf.navigationController pushViewController:[[MineController alloc] init] animated:YES];
    }];
}
5.2. 在子线程更新UI
比如网络请求回调等地方,如果希望更新UI,需要在主线程更新
6. 本地存储
在应用中往往需要一些数据保存在本地,比如上面的登录逻辑,需要在成功登录之后将token等信息保存在本地
6.1. NSUserDefaults
NSUserDefaults可以用来保存一些简单的配置,顾名思义,主要是保留用户的偏好设置或主题等,测试的话也可以用来保存token等用户信息,其使用方式与LocalStorage基本相同
NSUserDefaults *userDefaults = [NSUserDefaults standardUserDefaults];
[userDefaults setObject:token forKey:@"token"];
获取的话也很简单
+ (NSString *)getAccessToken {
    NSUserDefaults *userDefaults = [NSUserDefaults standardUserDefaults];
    NSString *token = [userDefaults objectForKey:@"token"];
    return token;
}
6.2. 文件沙盒
文件分为bundles和Datas
bundles包含当前应用配置信息和二进制文件及资源Datas包含当前应用的文件系统,下面是各个目录的作用Document可以备份和恢复,体积较大,主要保存用户数据Libary,开发者最常使用的文件夹,可以自定义子文件夹tmp,临时文件不备份,启动时可能被清除
待补充其他的本地存储方案
7. 小结
学习iOS开发,需要掌握下面几个方面的内容
UIKit库使用,对应Web开发的HTML标签- 掌握
UIWindow、UIScrollView、UILabel、UIImage等基础组件 - 使用
delegate实现自定义业务逻辑 WKWebView基本使用,了解Native与JavaScript交互及通信
- 掌握
- UI及布局,对应Web开发的流式、浮动、定位、伸缩盒布局等
- 掌握MVC结构,了解
UIView和UIViewController frame布局,声明view在视图中的具体尺寸,包括宽高、xy坐标等autoLayout,通过约束实现布局,主要是声明某个view与其他view的布局关系实现- 一些第三方的布局方案,如
flexBox等 - 屏幕适配
- 掌握MVC结构,了解
- 事件交互,对应Web开发的事件注册与事件处理函数
UIControl及Target-Action监听事件,给view添加事件及注册处理函数- 使用
UIGestureRecognizer实现自定义点击与手势,构造一个事件识别函数,然后绑定到某个view上
- 本地存储
- 了解iOS文件沙盒机制
- 网络
- 了解iOS网络库使用
- JSON序列化与反序列化
- iOS应用基本结构,这一块是Web开发不会涉及的地方,因此需要额外学习
- 应用生命周期、通知、
URL-Schema - 了解签名、证书、打包和发布相关流程
cocoapods管理第三方库
- 应用生命周期、通知、
本文是边学习iOS开发边整理的一些知识点,整个iOS学习断断续续大概花了两三周的样子,主要是UI组件和实现相关的地方,总是边学边抱怨相关的实现太繁琐了。目前已经2020年了,确实应该学习Swift和SwiftUI等比较新的iOS技术了,尝试了一下SwiftUI,声明式UI写起来简直比Flutter体验还要更好,接下来有时间就去折腾一下,至于OC,暂时先这样吧,先能看懂代码就行